How To Distort Perspective In Inkscape
How To Distort Perspective In Inkscape https://logosbynick.com/wp-content/uploads/2022/11/distort-perspective-inkscape.png 800 470 Nick Saporito https://secure.gravatar.com/avatar/8e31bf392f0ba8850f29a1a2e833cdd020909bfd44613c7e222072c40e031c34?s=96&d=mm&r=gOne of the greatest things about working with Inkscape is all of the advanced transformations you can make to paths. This is an area where even some of the paid apps fall short. One such transformation would be changing an object’s perspective. In this tutorial we’ll be going over how you can use Path Effect to distort the perspective of an object in Inkscape.
In short, this is done by simply selecting the object, opening the Path Effects menu, and applying the Perspective/Envelope path effect. From there, you can use the Nodes Tool to drag the corners of the object, which will change its perspective. Let’s have a closer look.
Distort Perspective In Inkscape
The following video tutorial will walk you through the entire process, step-by-step:
Continue on for the written instructions.
Table of Contents |
Step 1: Select the object and open the Path Effects menu
In order to distort the perspective of an object in Inkscape, we must first ensure that the object is a path and not a clip, mask, pixel-based image, or has any kind of filters applied. This process only works with:
- Individual paths
- Groups of individual paths
- Text objects
For this demonstration I will be using the Inkscape logo.
Simply click on the object to select it and open the Path Effects menu by navigating to:
Path > Path Effects
Alternatively, you can use the keyboard shortcut, which is Control + Shift + 7.
The menu should open on the right-hand side of your screen.
Step 2: Add the Perspective/Envelope path effect from the menu
With the Path Effects menu open, click on the little plus (+) icon in the bottom-left corner of the menu to add a new path effect:
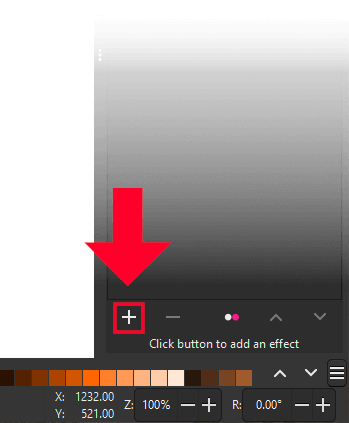
Click on the plus (+) icon to add a new path effect
If the button is grayed out then that means the object you are trying to apply the effect to is not a path. Please refer back to step 1.
Once clicked, a menu will populate with an array of path effects to choose from. Select the Perspective/Envelope option:
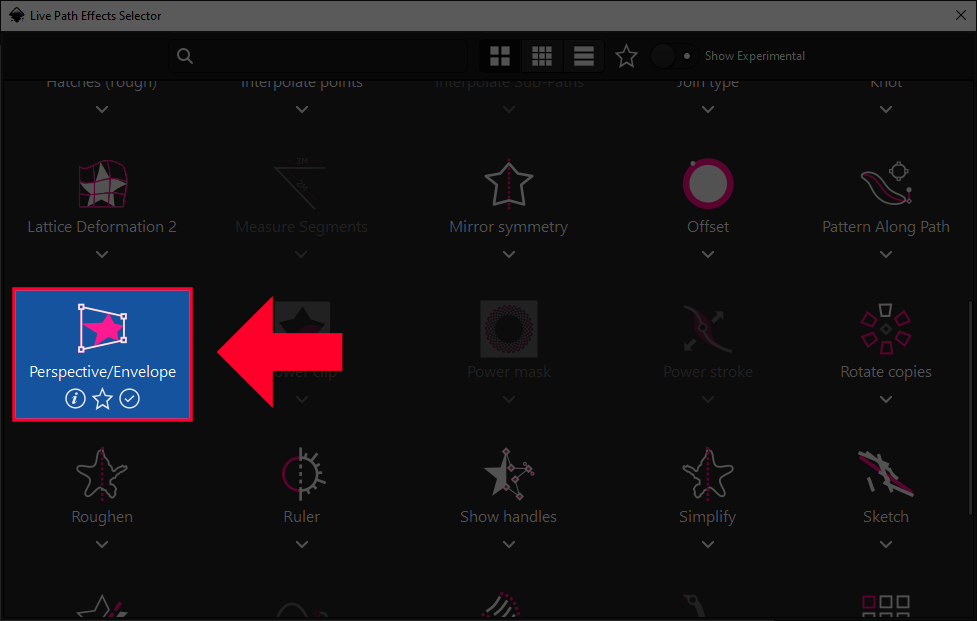
Choose the Perspective/Envelope path effect
If you’re having trouble accessing this path effect, you can search for it in the search bar at the top of the menu as a shortcut.
Step 3: Grab the Edit Paths By Nodes Tool and change the perspective of the object
Once you have added the Perspective/Envelope path effect to your object, you can distort the perspective of your object by grabbing the Edit Paths By Nodes Tool (keyboard shortcut: N) and clicking and dragging the 4 white nodes at each corner:

Use the nodes at the corners to change the object’s perspective
Within the Path Effects menu you will see two options that let you lock the perspective change to either the vertical or horizontal axis:
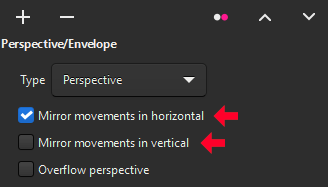
Use these settings to change the perspective only by the vertical or horizontal axis
Enabling the Horizontal option will make it so that the perspective is only distorted along the horizontal axis:

Likewise, choosing the Vertical option will make it so that the perspective is on changed along the vertical axis:

You can deselect these options at any time to return back to free form distorting of the perspective.
Step 4: Finalize the changes by converting the object to a path
Once you are finished distorting the perspective of your object, you may want to finalize the effect so that you can continue transforming the path the same way you would any other path. To do this, select the object and navigate to:
Path > Object To Path
It should be noted, however, that this will finalize the perspective as it currently is. You will not be able to go back and alter it again unless you add another path effect.
Conclusion
Thanks to all of its handy path effects, distorting the perspective of an object in Inkscape couldn’t be easier. Those of you who may be users of other vector apps (such as Affinity Designer) may find this to be a refreshing feature as it does not exist in Designer. Inkscape has you covered though.
If you have any questions or need clarification on any of the steps taken in this lesson just leave a comment below.
Learn To Master The SoftwareGain a complete understanding of your favorite design apps with my comprehensive collection of video courses. Each course grants access to our private community where you can ask questions and get help when needed.
|
||||||||||||||||||||||||||||||||


Okay, good to know, but I wonder why this is not a regular tool within the standard transformation process of inkscape anyways (as is in Photoshop for example)… There’s enough modifier key combinations or more intuitive ways to implement this as opposed to applying an extra path effect…
Nice tutorial!
You can also apply a perspective transformation on raster images using this extension: https://github.com/s1291/InkRasterPerspective
Thanks for sharing!