How To Remove A Background From An Image With Inkscape
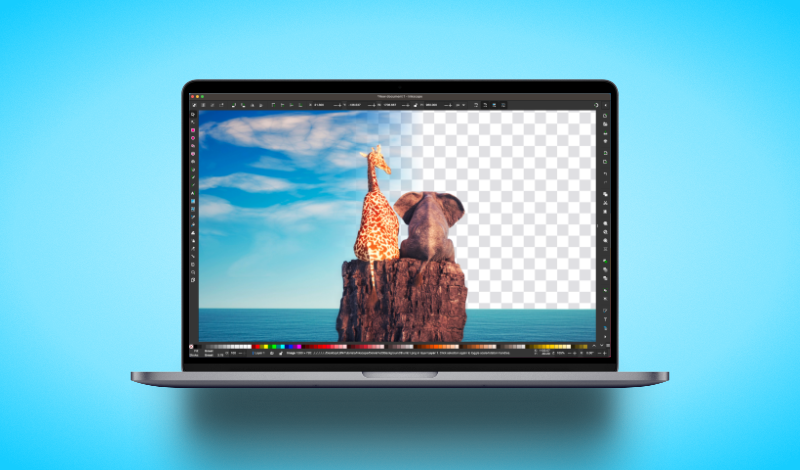
How To Remove A Background From An Image With Inkscape https://logosbynick.com/wp-content/uploads/2023/03/remove-background-inkscape.png 800 470 Nick Saporito https://secure.gravatar.com/avatar/8e31bf392f0ba8850f29a1a2e833cdd020909bfd44613c7e222072c40e031c34?s=96&d=mm&r=gIn this tutorial we’ll be going over how to remove a background with Inkscape. Although Inkscape is a vector-based tool, that doesn’t mean it can’t handle simple image-editing tasks. And if all you need to do is delete a background from an image then Inkscape should be a sufficient enough tool in most instances.
Inkscape may not be the best tool for removing backgrounds from images, but if you’re working with a simple enough image with a well-defined subject and background then it can be accomplished by drawing a path over your subject then using then path as a clipping mask. Best of all, clipping masks are non-destructive, meaning your background can be restored at any point if you desire.
Remove A Background With Inkscape
Due to the nature of working with paths in Inkscape, it is recommended that you watch the video tutorial for this lesson. It will walk you through the entire process step-by-step:
Continue on for a written outline.
Table of Contents |
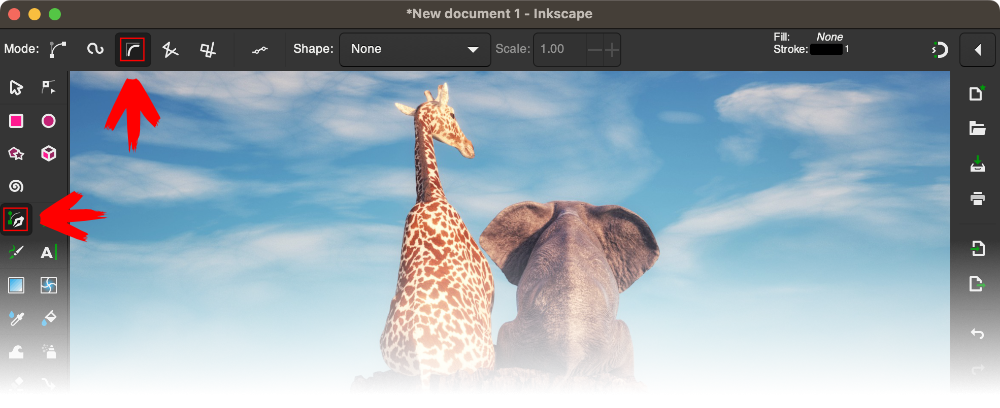
Step 1: Grab the Bezier Pen and enable the “BSpline” setting
Once you’ve opened or imported your image into Inkscape, grab the Bezier Pen from the toolbar on the left-hand side of the screen. It can also be accessed using the keyboard shortcut: B.
Locate the tool settings menu towards the top of the screen. On the left-hand side of the menu where it says Mode you will see three different settings for the Bezier Pen:
- Create regular Bezier path
- Create Spiro Path
- Create BSpline path
Select the BSpline option, which is the option furthest to the right:
Click to enlarge.
This setting makes it easiest to draw basic paths. It is sort of like training wheels for the Bezier Pen.
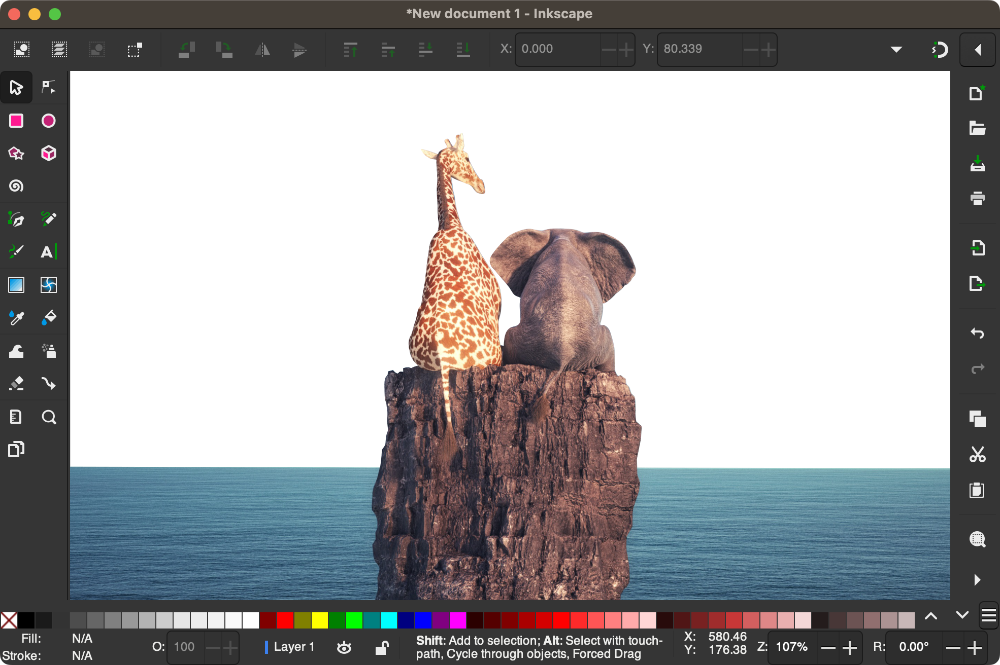
Step 2: Click to add points around the subject of the image
Now it’s time to draw a path that outlines the subject of your image.
With the Bezier Pen selected, begin clicking to add points around the subject of your image. As you add points, a line will be drawn connecting them. This is known as a path.
The lines you draw will automatically be smooth. If at any point you need the path to be straight, or you need to create a point that is a corner, simply hold the Shift key while clicking to add your point.
Finish drawing your path around the subject and close the path by clicking on the original point. You should now have a vector path outlining your subject:

Tip: reducing the opacity of the image will help you see the path more clearly.
This is the most difficult step in the lesson, so if you’re struggling to catch the hang of it then it is recommended that you watch the video tutorial above.
Step 3: Use the path you’ve drawn as a clipping mask for the image
Now that your path is drawn you can use it as a clipping mask to remove the background from the image.
To do so, select both the path and the image at the same time. This can be done by clicking and dragging a bounding box around each or by clicking on each while holding the Shift key.
With both selected, navigate to:
Object > Clip > Set Clip
Once selected, your image will only be visible in the area where the path is, meaning the background will effectively be gone:
You can now export it as a PNG image with a transparent background. Exporting as JPEG will cause the background to be white as it does not support transparency.
Clipping masks are non-destructive, so if you want to restore the background at any point, all you have to do is select the image and go to:
Object > Clip > Release Clip
What If This Doesn’t Work?
Although Inkscape can be used to delete backgrounds from images that are simple or well-defined, Inkscape won’t always be the best tool to use based on the image. For deleting images with finer details where the subject isn’t as well-defined, such as hair, then you’d be better off using something like GIMP to remove your background.
Learn To Master The SoftwareGain a complete understanding of your favorite design apps with my comprehensive collection of video courses. Each course grants access to our private community where you can ask questions and get help when needed.
|
||||||||||||||||||||||||||||||||


Because of you, I have an almost perfect image with no background! Thank you! Do you have a YouTube channel?
Glad to hear that! Yes, I have several: “Logos By Nick” and “Design Made Simple”
Very helpful Information and Keep Sharing More.
Hello, Nick! How are you? Your tutorial is wonderful, quite well done!
I have been using Inkscape, MakerCase, and the Trotec laser engraver/cutter at the public library to make pentagon boxes, with removable lids, out of baltic birch plywood. These are gifts for good friends. On each side, top, and bottom of the box, I engrave text and/or images.
A friend drew (using pencil I believe) four images of bird cages, and people escaping and transforming into birds. All of the images are on a single piece of paper. She then took a photo of the piece of paper, and posted it on Facebook. I would attach the JPG photo here, but it does not seem possible.
I would like to separate the images and laser engrave them onto separate sides of the pentagon box, so I watched your video hoping it would help. I do not know if this would be an issue for engraving, but the background of the photo is not perfectly white, but instead shades of gray. To remove the background, I have tried on the photo “Object to Path” and then “Trace Bitmap” with “Remove Background” but then you really see the various shades of gray in the background. I have also played around with the “Filters,” producing the best effects with the “Sharpen” under “Image Effects.” What I would like to achieve are simple pencil drawings on a white background for the laser engraver.
The staff at the library are very nice, but they are learning as well. I suppose it’s possible I just need to clip each image and not change it. I hope I have given you enough detail to help me. Thank you, Nick! I hope you are well and I look forward to hearing from you. Best, Deb
Jaco asked a question that was not answered.
HOW do you remove background from areas inside the object.
I have a car pic that has trees and things in the background (which I removed) but you can still see trees and pavement in areas inside the car pic that I want to remove also. I’d be happy to end a couple of pics to show you what I’m meaning.
For that you would have to create new tracings for those negative space areas and place them on top of the original tracing, then use the Difference path operation. I did something similar at the 3:12 mark in this tutorial: https://youtu.be/ulvyKudgZPE?t=192
Nick how do you remove a background colour that is only one colour
This method could work if the color is a lighter shade than the rest of the image. If there isn’t enough contrast between the foreground and the background then you’d have to manually trace it using this method here: https://logosbynick.com/inkscape-how-to-remove-background/
Selecting the path is being difficult for me….but great descriptions thank you.
Hey Nick – thanks a lot for this tutorial.
Question though: you mention the beauty of this is that the effect can be reversed, but this is precisely what I would not want in the case Inam dealing with.
Is there any way to delete the “left-over from clipping” permanently from memory?
Here’s why I am asking: Right now, if I attempt to run a trace bitmap on the clipped-out section, inkscape would ignore the clipping and take the entire picture, and what I would want is to limit the tracing to the portion I have clipped out
Any ideas / hints as to how I could accomplish this? Tried a few things, but can’t figure it out.
Thanks in advance
-jr
(of course I could crop the picture outside of inkscape and import the cropped section – just wondering whether this can be done in inkscape)
The only way to do that would be to export the clipped object then import it back into Inkscape.
Thank you — great tutorial!
I can’t use Inkscape for image background removal. I think Inkscape is more comfortable and familiar right now. It makes for a more efficient workflow. Now I will be try. Thank you so much for your information.
“easily”. Bottom line is there is no easy (automated) way to remove backgrounds yet. Thanks anyway for the great tutorial.
So there is no eraser mode that takes out the background off of simple shapes?
There is an eraser tool but it only works on vector objects. There’s nothing in Inkscape that allows you edit rasterized photos in a similar way.
How do you clip out/remove the smaller background areas that are surrounded? For example, the background between the 2nd digit of the thumb and the phone?
If I redo the bezier curve on these type of backgrounds after removing the overall background, it clips the image to that small area instead of removing it.
Hi!
I have a floating object I’m trying to keep, as well as birds sitting on a fence. I want the background behind all gone.
After I have outlined what I want to keep with my bezier and go to fill, it also fills the smaller background pieces I’m trying to leave behind. (Between fence bars). When I click on those smaller sections and try to say no fill, it clicks as if it is not filled, but it stays filled.
So when I go to clip the smaller background sections inside the image I do want, they come along for the ride.
Any tips?
I don’t get it – when you say things like @simply select both the outline and the image@
Why don’t you explain how to do it?
It would be too lengthy to type out every detail. If you don’t understand the instructions then I would recommend watching the video tutorial at the bottom of the article. It explains each and every step so that even a first time user could understand.
When I select the image to go to object>clip it doesn’t do anything. What am I doing wrong?
Do you have them both selected?
May peace be upon you, i love your tutorial, you have a great way of passing information, thanks alot !
Thanks, glad to help!