How To Use Pantone Colors In Affinity Designer
How To Use Pantone Colors In Affinity Designer https://logosbynick.com/wp-content/uploads/2023/07/use-pantones-affinity-designer.webp 1000 587 Nick Saporito https://secure.gravatar.com/avatar/8e31bf392f0ba8850f29a1a2e833cdd020909bfd44613c7e222072c40e031c34?s=96&d=mm&r=gIn this tutorial we’ll be having a look at how you can find and use Pantone colors in Affinity Designer. Then, we’ll go over how to properly save/export your work as a PDF file with printer marks, registration marks and a color bar.
Pantones are a proprietary color space most commonly used when designing for print, and if you’re an Adobe user you will have to pay for a Pantone license for color books that aren’t CMYK coated, uncoated, or metallic coated.
That’s okay though because Affinity Designer already has the full gamut built into its Swatches panel. Let’s have a look at how you can use them.
Using Pantones In Affinity Designer
The following video tutorial will walk you through the entire process, including how to properly export your work with printer marks and a color bar:
To get started, all you have to do to access Pantone colors in Affinity Designer is open the Swatches menu located towards the top-right of your screen:
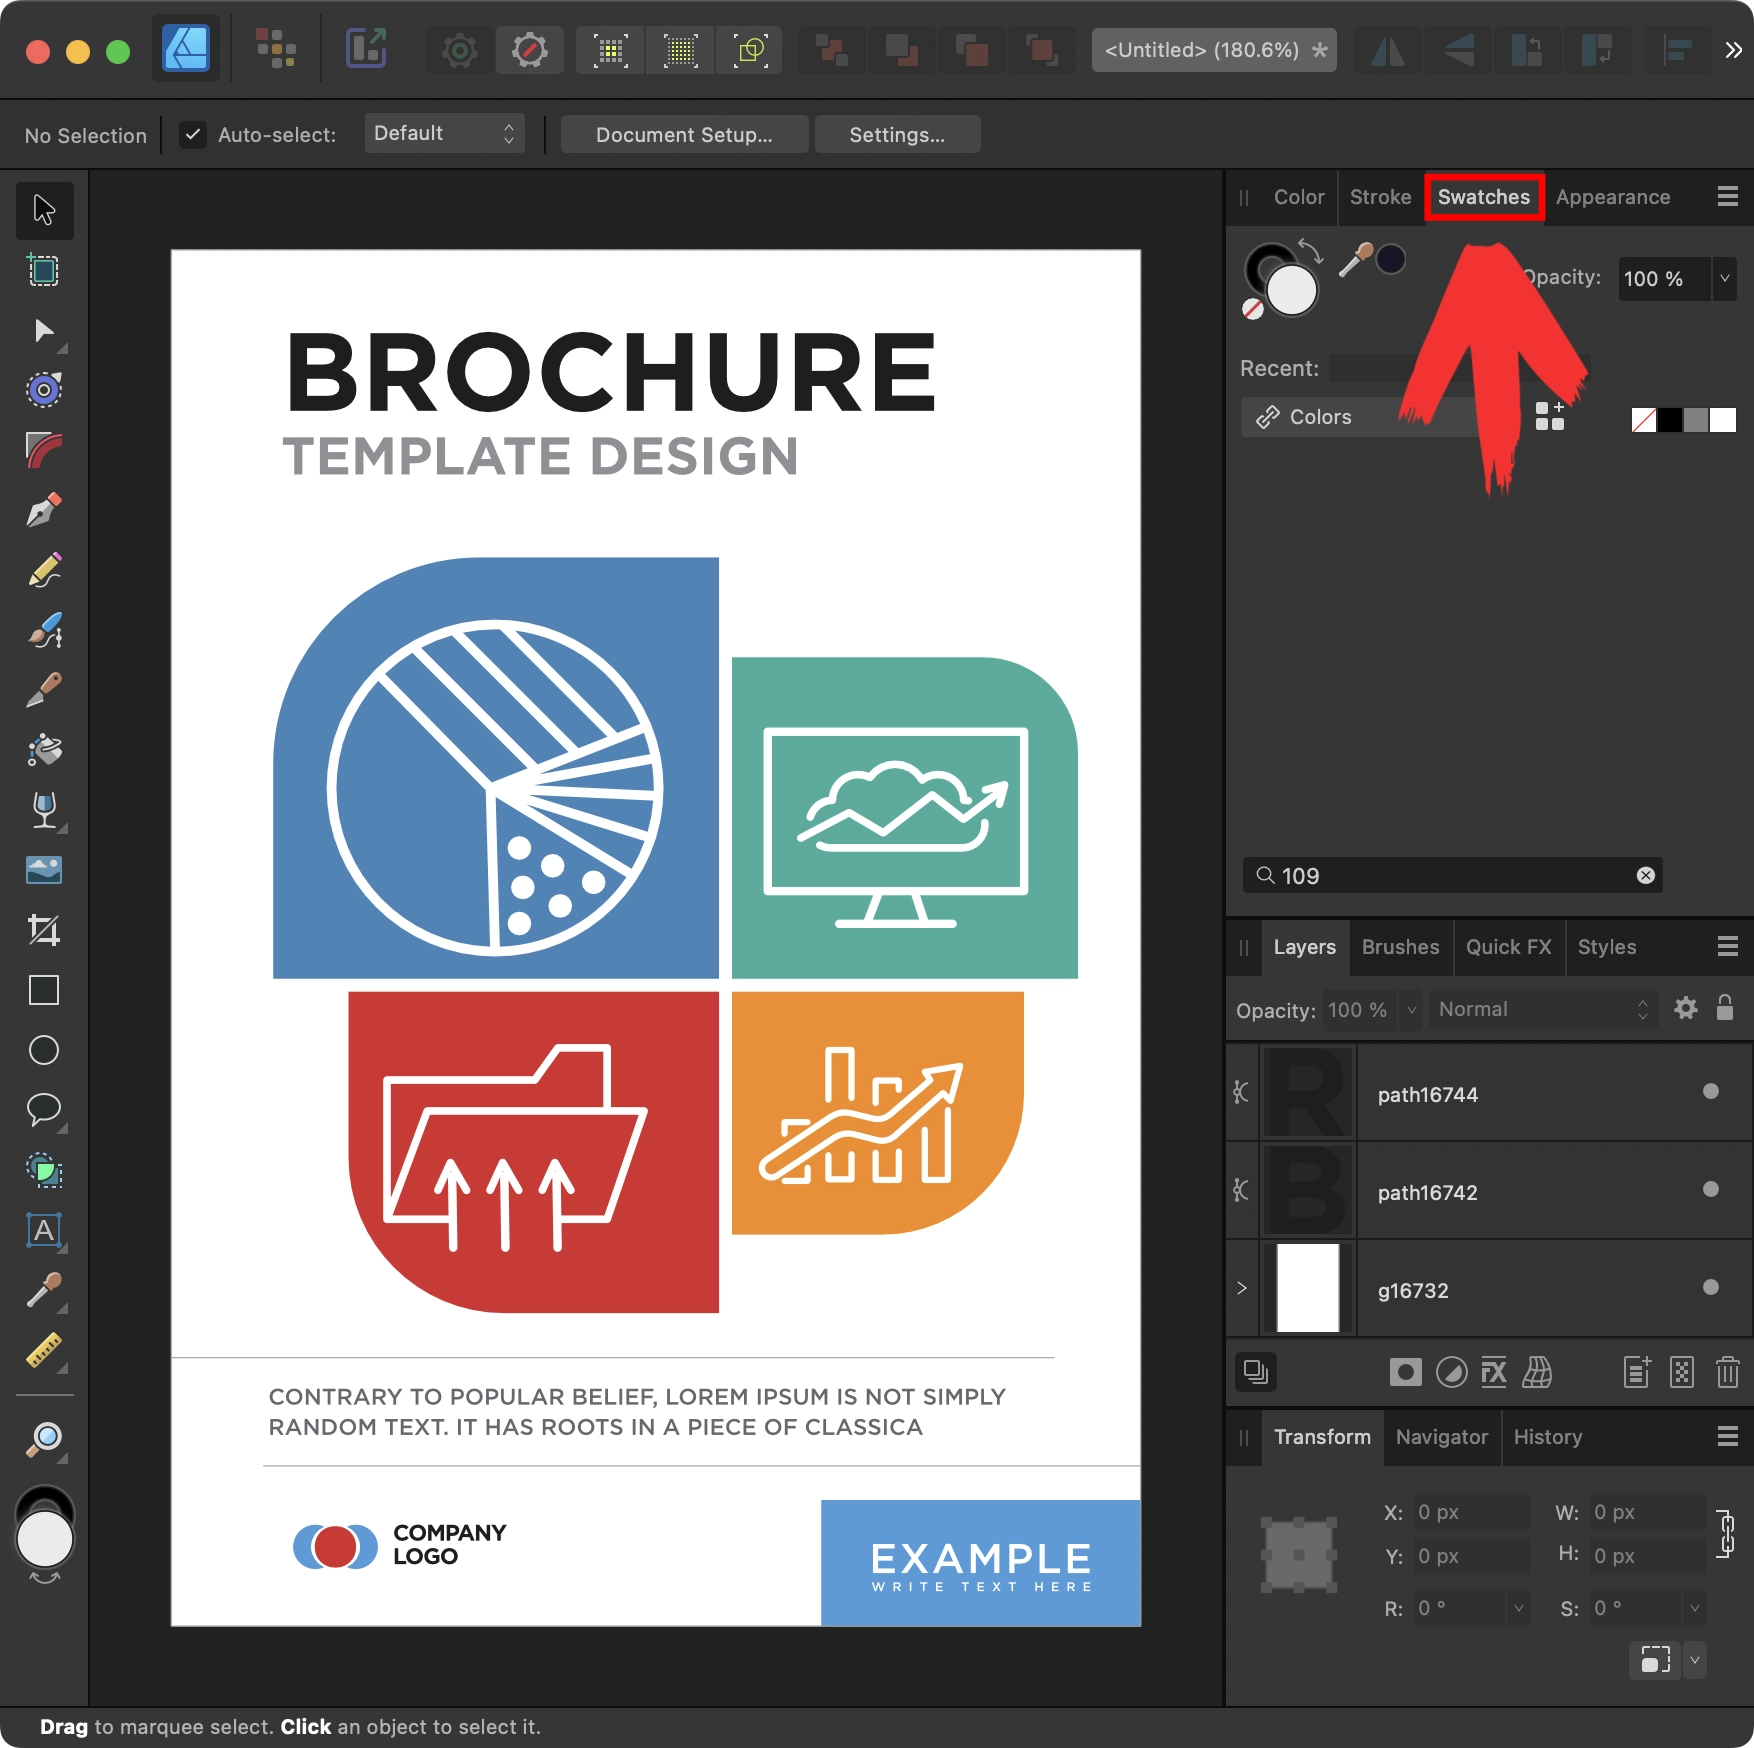
The Swatches tab can be accessed towards the top-right of the screen (click to enlarge.)
If you do not see the Swatches menu then you can access it by navigating to:
Window > Swatches
It is recommended that you click and drag the tab label to pop the menu out of the dock. This will make it easier to work with as the colors won’t be confined to a tiny viewing window.
Once opened, simply click on the Colors dropdown and you should see a complete list of all the Pantone color books you can sample from in Affinity Designer:
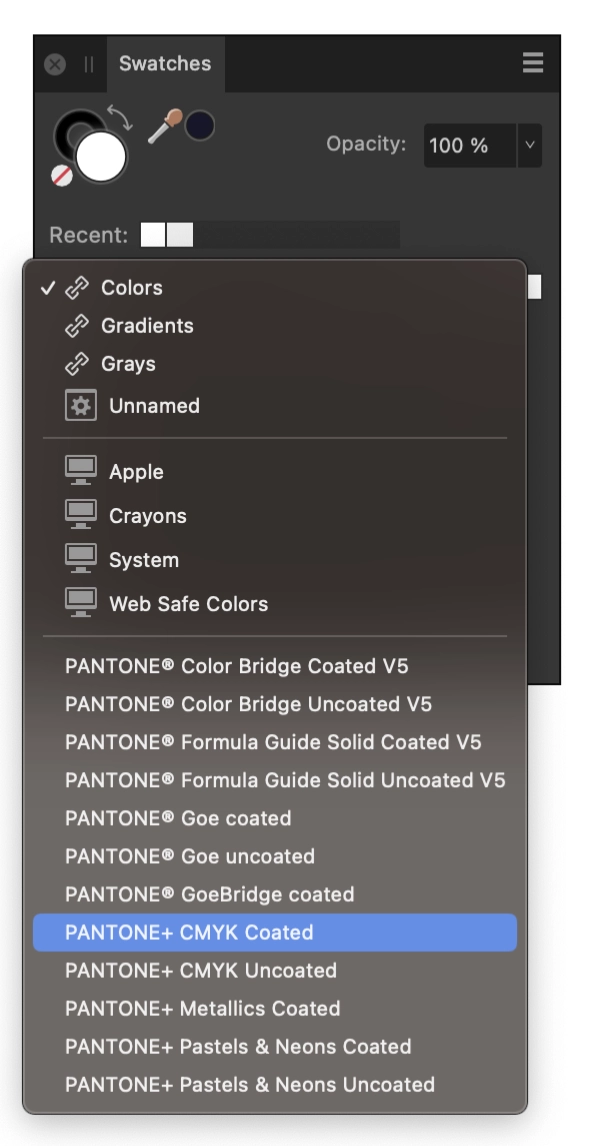
As you can see, there are many to choose from. If your print shop has requested a specific profile then choose it from the list. Otherwise, the most commonly used books are CMYK Coated and CMYK Uncoated, so we’ll be choosing one of those for this demonstration.
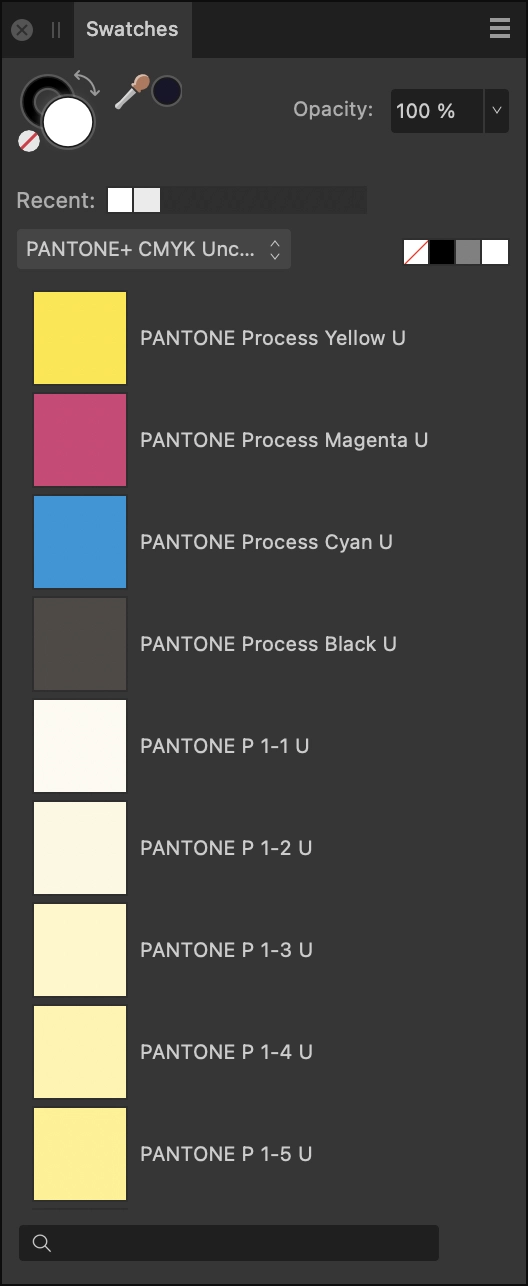
Once selected, you should see all of the swatches included in the book:
Popping the menu out of the dock allows you to elongate the menu so you can see more of the color options.
Tip: you can click the menu icon in the top-right corner of the menu and use the Appearance setting to make the swatches larger or even index them as a list so you can see the Pantone codes associated with each (as depicted in the screenshot above.)
If you’re looking for a specific color code then you can search for it using the search bar at the bottom of the menu:
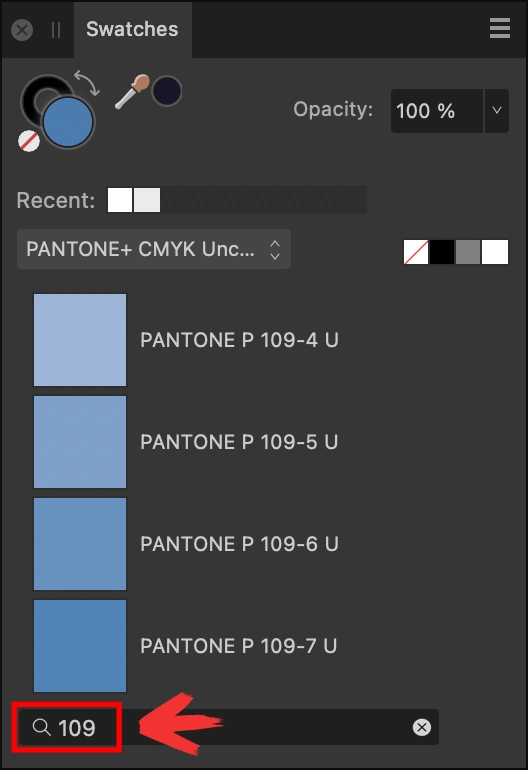
Use the search bar to find a specific Pantone color by code.
As you type in the code, the swatches depicted in the menu will be reduced to only the colors that include the inputted code.
Once you’ve found your Pantone swatch of choice you can apply it to your work the same way you would any other color. Simply click on an object to select it, then click the swatch to apply it to the object.
All Pantone colors that you select will also be added to the document’s swatch.
How To Properly Export Designs With Pantones
If you’re working with Pantone colors in Affinity Designer then chances are it’s because you’re designing something for print. So let’s have a look at how you can properly save/export your work in such a way that it includes printer marks, registration marks, and a color bar for your Pantone shades.
Open the Export menu by navigating to:
File > Export
The menu should look something like this:
Click to enlarge.
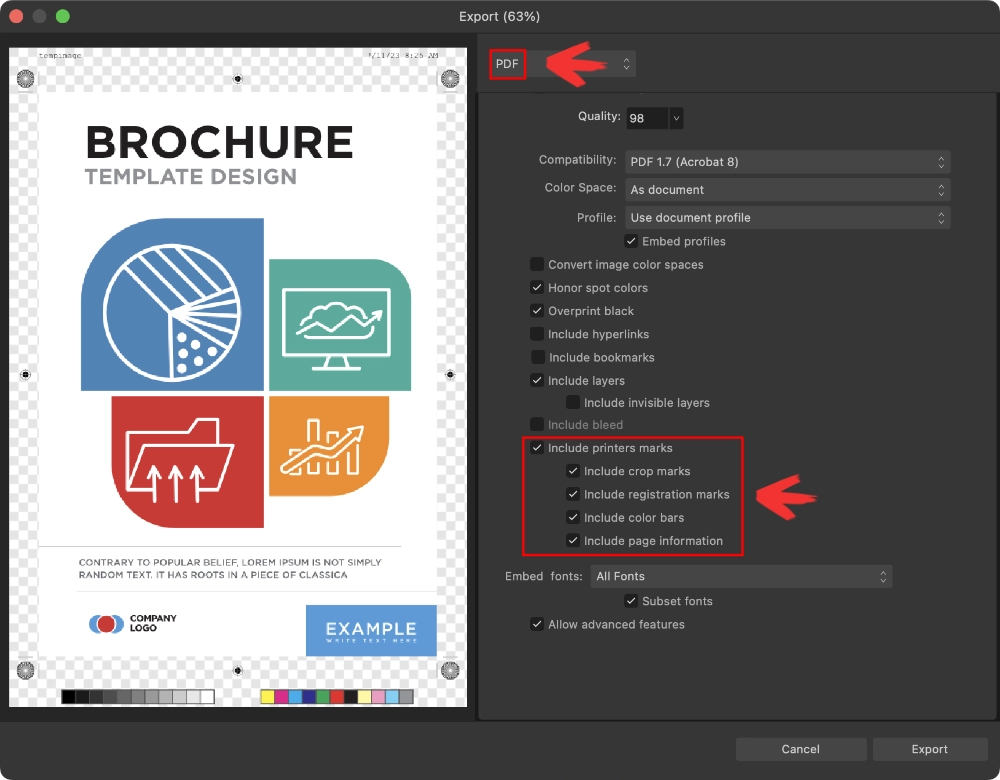
From the dropdown list at the top of the menu, choose PDF. Then, input your desired DPI setting, expand the Advanced tab, and scroll down to where it says “Include Printer Marks” and tick the box to enable the following options:
- Include crop marks
- Include registration marks
- Include color bars
- Include page information
Select the options you’d like to apply and click the Export button to save your work.
In Conclusion
Last year when Adobe announced that it would start requiring users to pay for access to Pantone colors, I contributed a quote to Lifewire mentioning how silly it would be to pay monthly for Pantones when you can just purchase Affinity Designer once and have access to them indefinitely. Hopefully this serves as the wakeup call to the design industry to realize just how valuable a tool Affinity Designer really is.
Learn To Master The SoftwareGain a complete understanding of your favorite design apps with my comprehensive collection of video courses. Each course grants access to our private community where you can ask questions and get help when needed.
|
||||||||||||||||||||||||||||||||


It’s a pity that Pantone export does not apply to brushes with Pantone colors… after export we get CMYK